Setting up Oracle Container Engine for Kubernetes (OKE) with three worker nodes
In this tutorial, I will explain how you set up a Kubernetes Cluster consisting of the Kubernetes Control Plane and the Data Plane (Node Pool) using the Oracle Container Engine (OKE) for Kubernetes. I will also deploy and delete two sample applications on the Kubernetes platform to prove it works. This tutorial will set the stage for future tutorials that will dive into networking services offered inside Kubernetes for container-hosted applications.
The Steps
- STEP 01: Create a new Oracle Kubernetes Cluster (OKE) and verify the components - STEP 02: Verify the deployed Oracle Kubernetes Cluster (OKE) cluster components in the OCI console - STEP 03: Verify if the Oracle Kubernetes Cluster (OKE) cluster is running (using the CLI) - STEP 04: Deploy a sample NGINX application (using kubectl) - STEP 05: Deploy a sample MySQL application (using helm chart) - STEP 06: Clean up PODS and Namespaces
STEP 01 - Create a new Oracle Kubernetes Cluster and verify the components
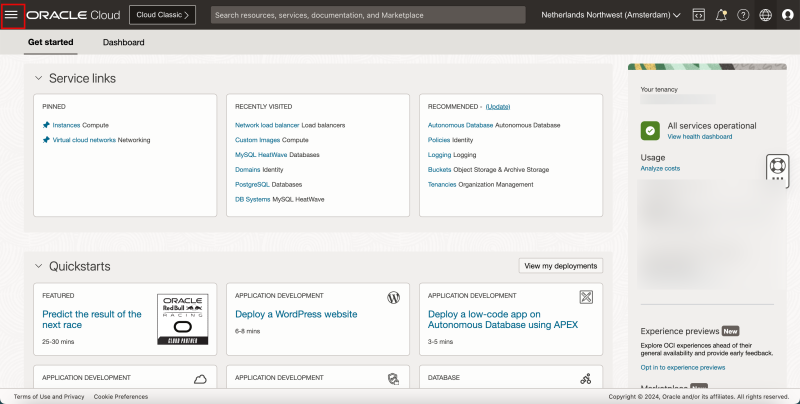
- Click the hamburger menu.
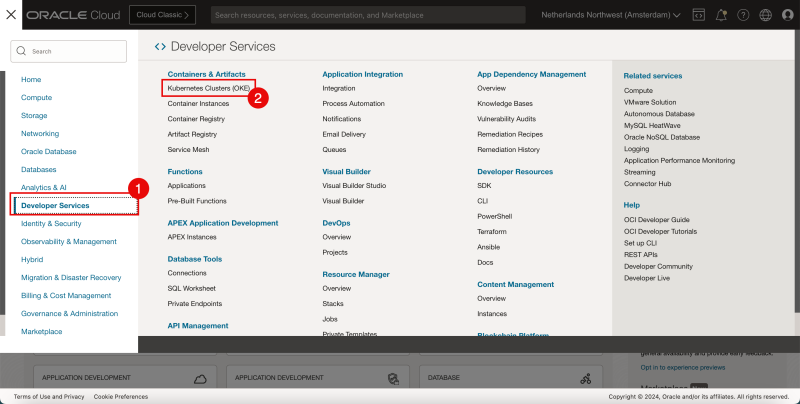
1. Click on **Developer Services**. 2. Click **Kubernetes Clusters (OKE)**.
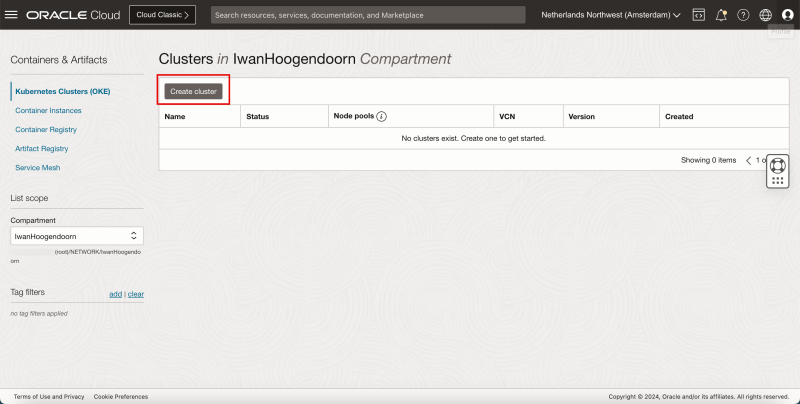
- Click on **Create Cluster**.
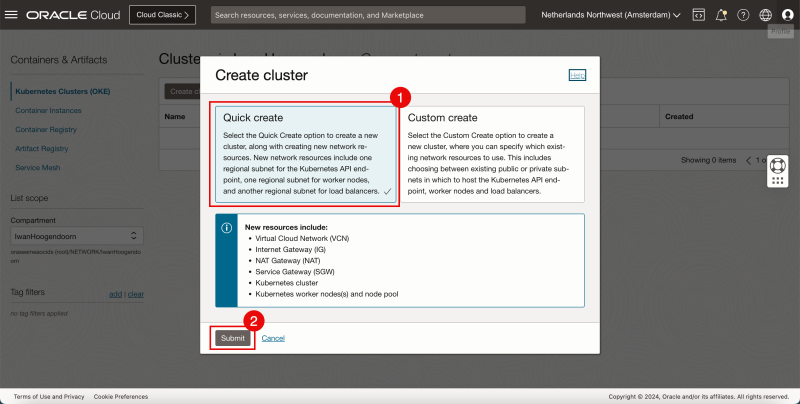
1. Select **quick create**. 2. Click on **Submit**.
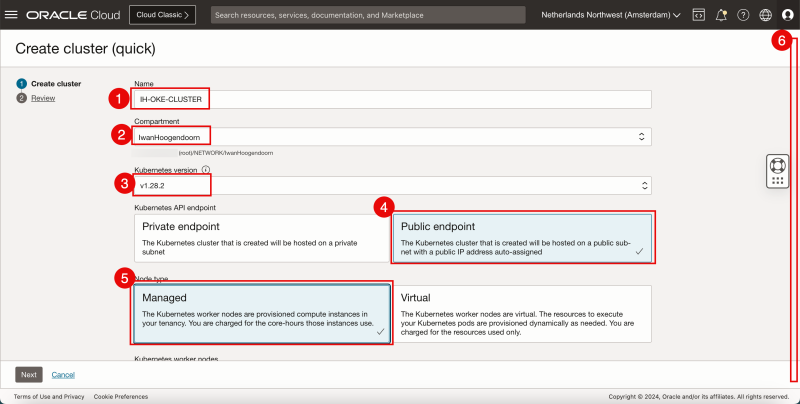
1. Enter a Cluster Name. 2. Select a Compartment. 3. Select the Kubernetes version. 4. Select the Kubernetes API endpoint to be a **Public endpoint**. 5. Select the Node Type to be **Managed**. 6. Scroll down.
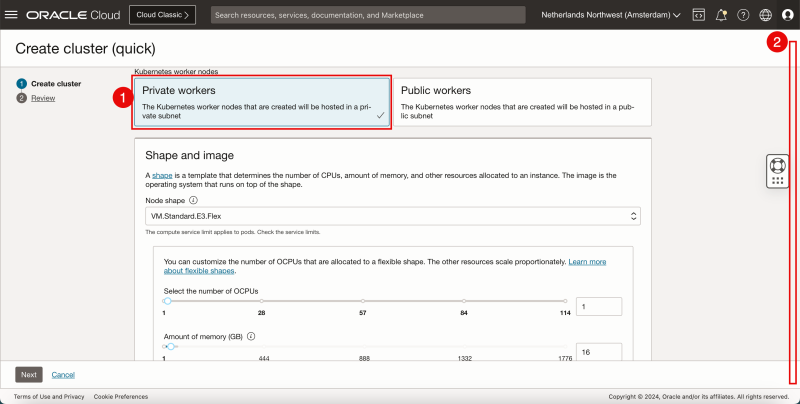
1. Select the Kubernetes Worker nodes to be **Private workers**. 2. Scroll down.
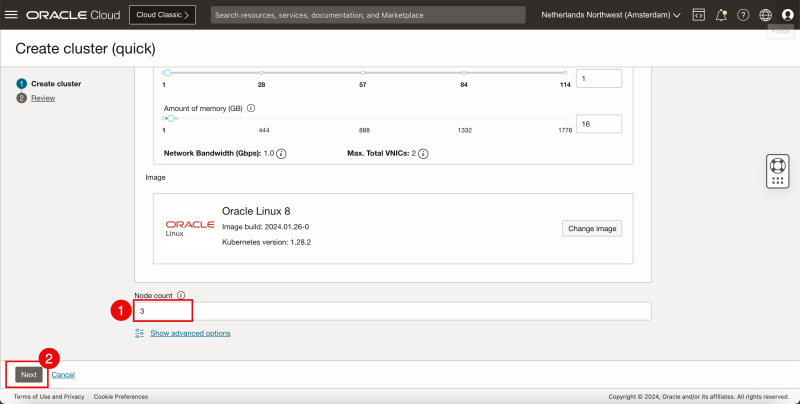
1. Leave the Node count (Worker nodes) default **(3)**. 2. Click on **Next**.
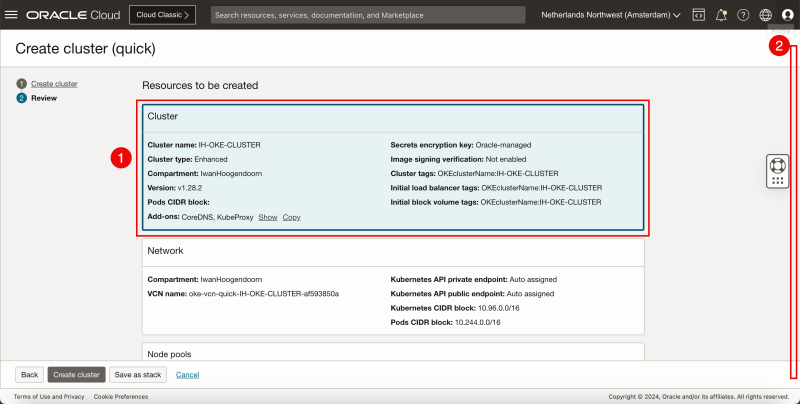
1. Review the Cluster parameters. 2. Scroll down.
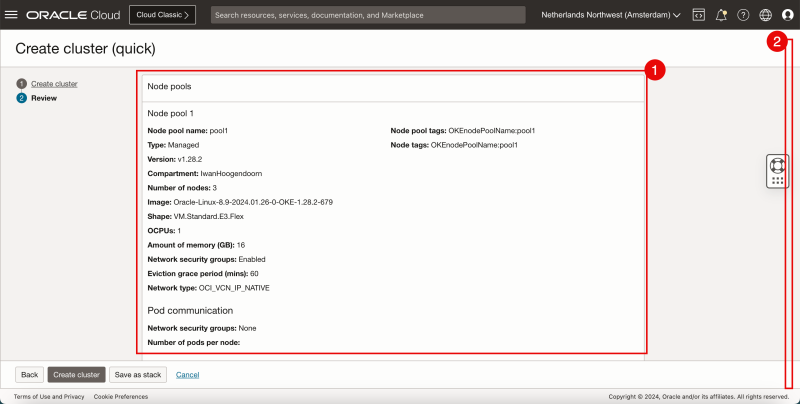
1. Review the Node Pools parameters. 2. Scroll down.
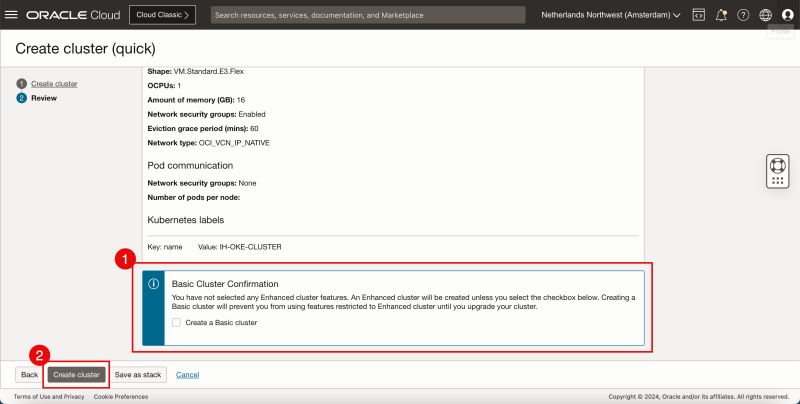
1. Do NOT select to create a Basic Cluster. 2. Click on **Create cluster**.
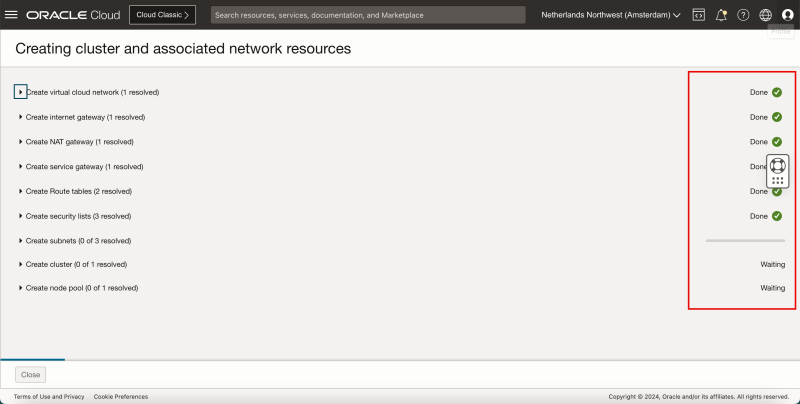
- Review the status of the different components that are created.
1. Review the status of the different components that are created.
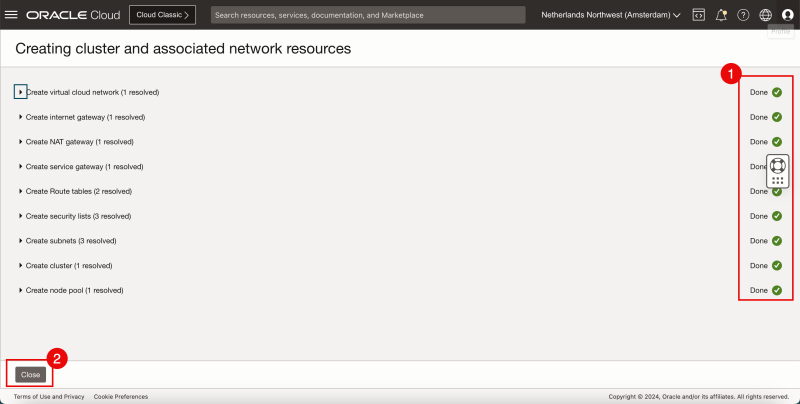
1. Make sure everything has a green check.
2. Click on **Close**.
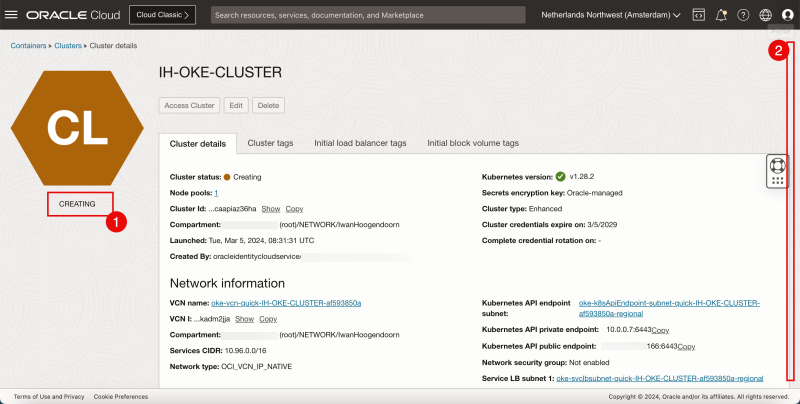
1. Review that the status is CREATING. 2. Scroll down.
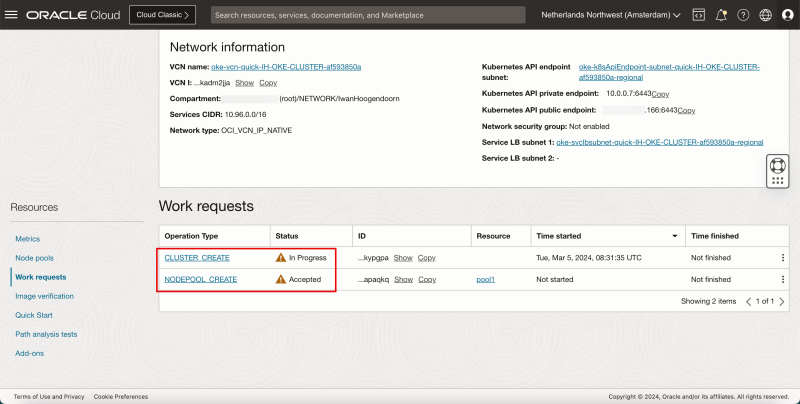
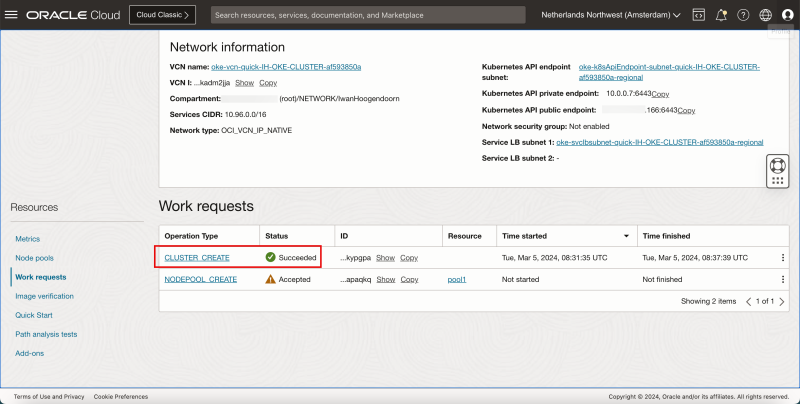
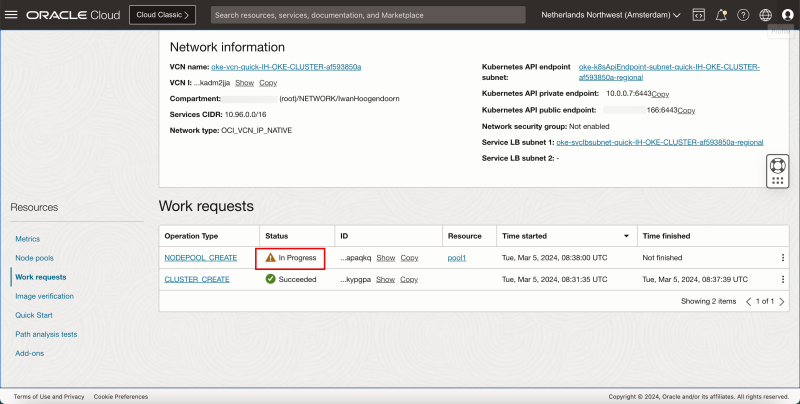
- Review the CLUSTER and NODEPOOL creation status. - The Kubernetes control CLUSTER is being created and the worker NODEPOOL will be created later.
- After a few minutes the Kubernetes control CLUSTER is successfully created.
- The worker NODEPOOL will now be created.
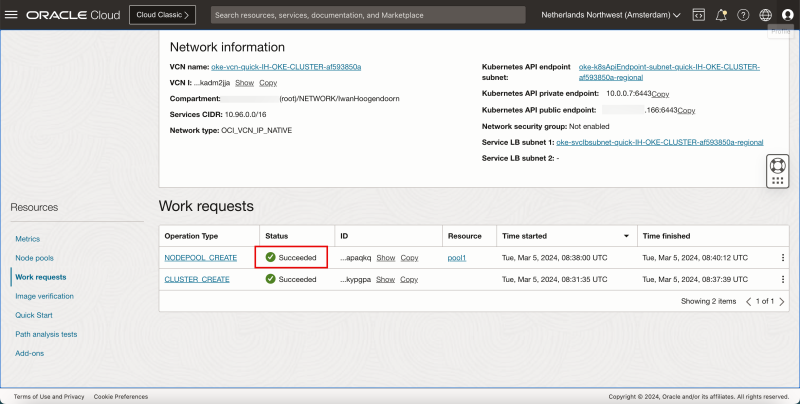
- After a few minutes the worker NODEPOOL is successfully created.
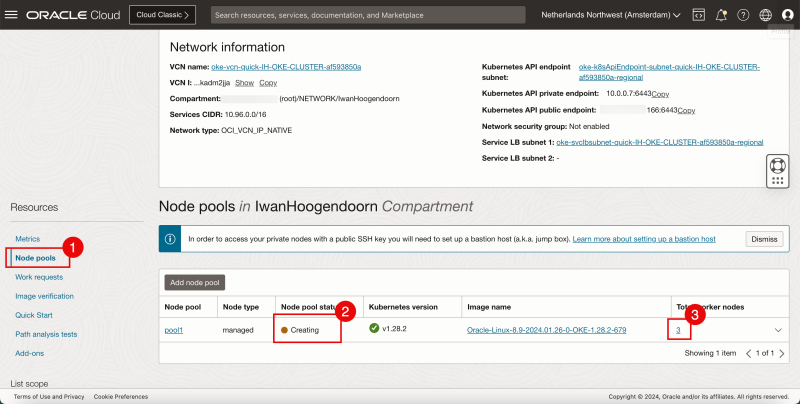
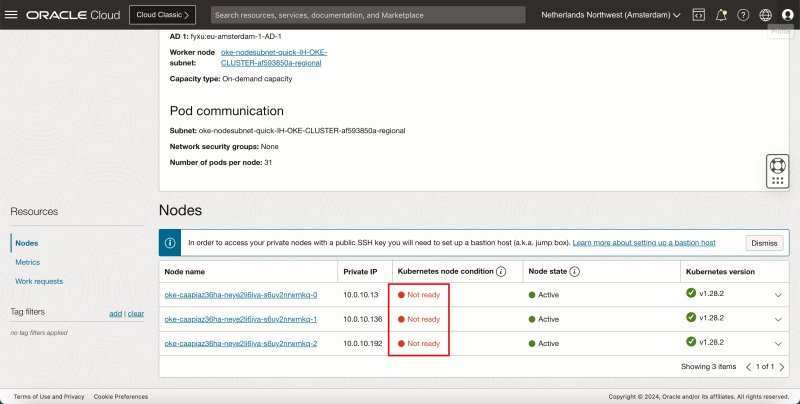
1. Click on **Node Pools**. 2. Notice that the (Worker) Nodes in the pool are still being created. 3. Click on the number **3** of (Worker Nodes).
- Notice that not all nodes and Not ready (yet).
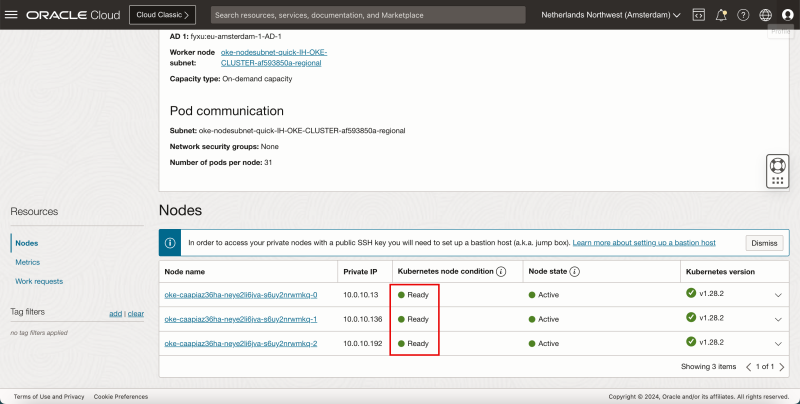
- After a few minutes they will be Ready.
At this point, the Kubernetes Control cluster and worker nodes are fully deployed and configured inside Oracle Cloud Infrastructure (OCI). This is what we call the Oracle Cloud Kubernetes Engine (OKE).
STEP 02 - Verify the deployed Oracle Kubernetes Cluster cluster components in the OCI console
When you use the Oracle Cloud Kubernetes Engine (OKE) to create a Kubernetes cluster some resources will be created inside OCI to support this deployment.
The first and most important resource is the Virtual Cloud Network (VCN). Because I have chosen the “Quick Create” option a new VCN dedicated to OKE was created.
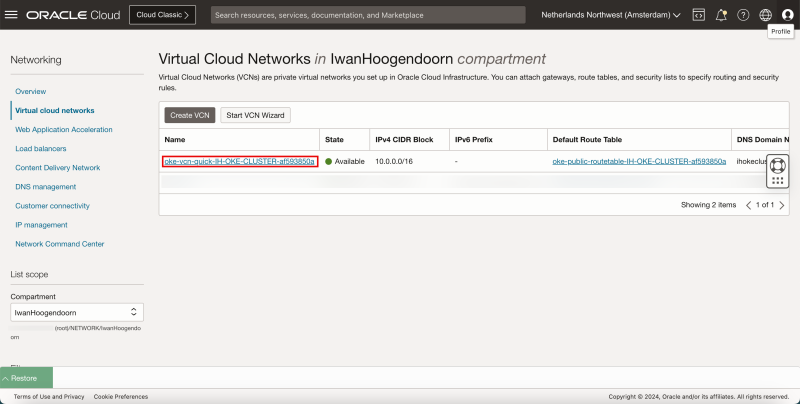
If you navigate through the OCI Console using the hamburger menu and then **Networking** > **Virtual Cloud Networks (VCN**) you will see the new VCN that was created.
Click on the **VCN**.
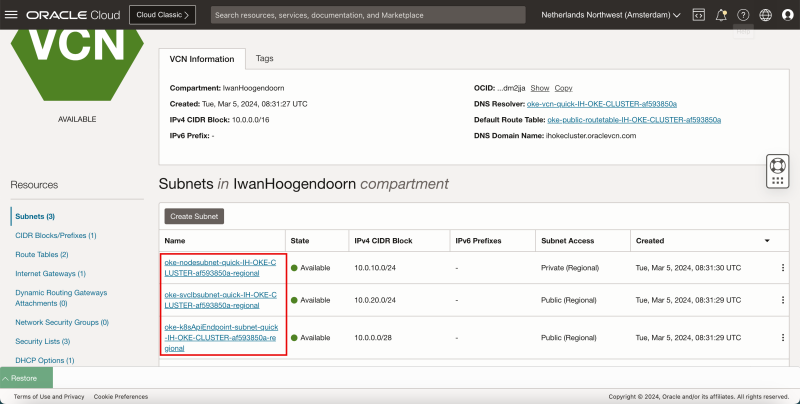
Inside the VCN you will see three Subnets, one Private and two Public Subnets to support the OKE deployment.
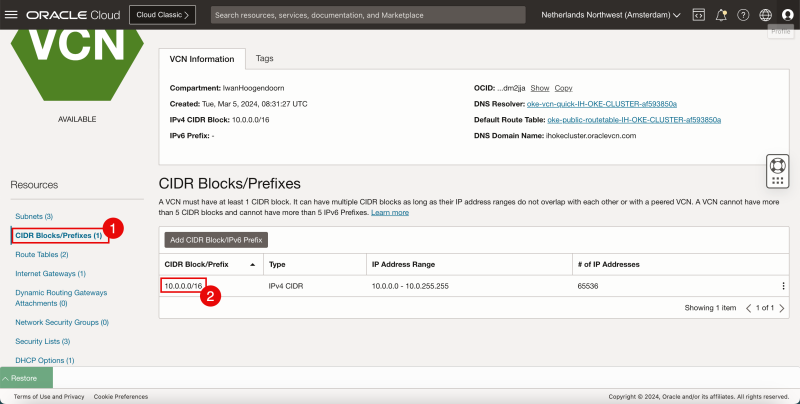
1. Click on **CIDR Blocks/Prefixes** to review the CIDR of the VCN. 2. Notice that 10.0.0.0/16 was assigned by OCI.
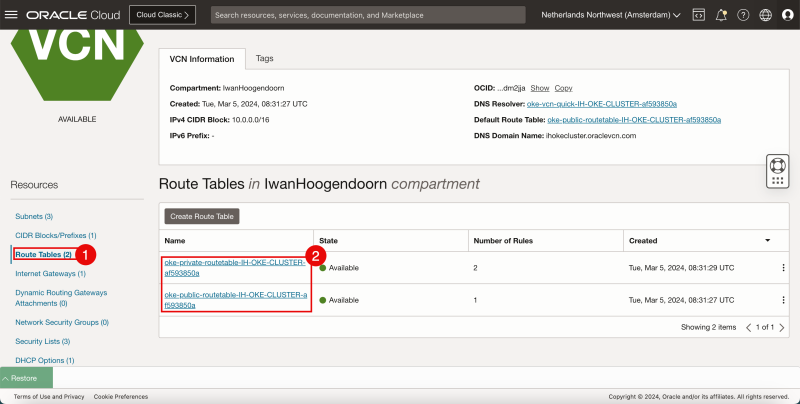
1. Click on the **Route Tables** to review the routing tables. 2. Notice that there are two routing tables created, one to route to private subnets, and one to route to public subnets.
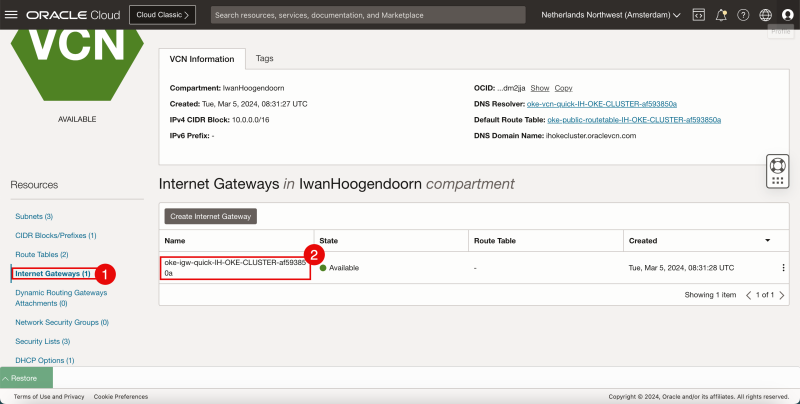
1. Click on the **Internet Gateways** to review the Internet Gateway that will provide internet connectivity using the public subnets to and from the internet. 2. Notice there is only one Internet Gateway.
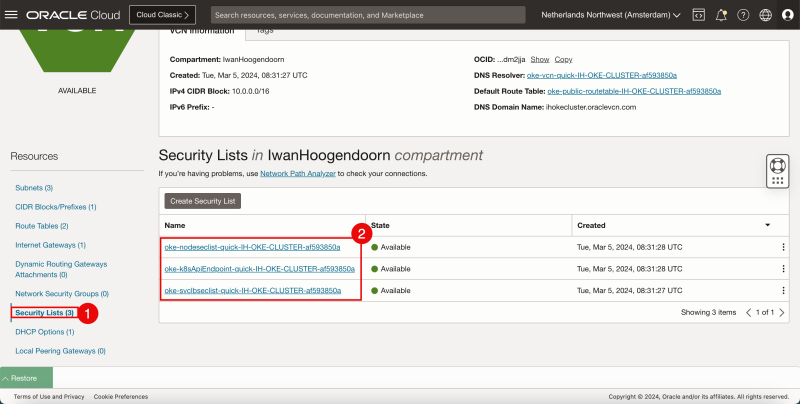
1. Click on the **Security Lists** to review the Security Lists that can be either Ingress or Egress Rules to protect connectivity between the subnets. 2. Note that there are three Security Lists, one used for Kubernetes (Worker) Node Connectivity protection, one used for Kubernetes API Endpoint protection, and one used for Kubernetes Services protection.
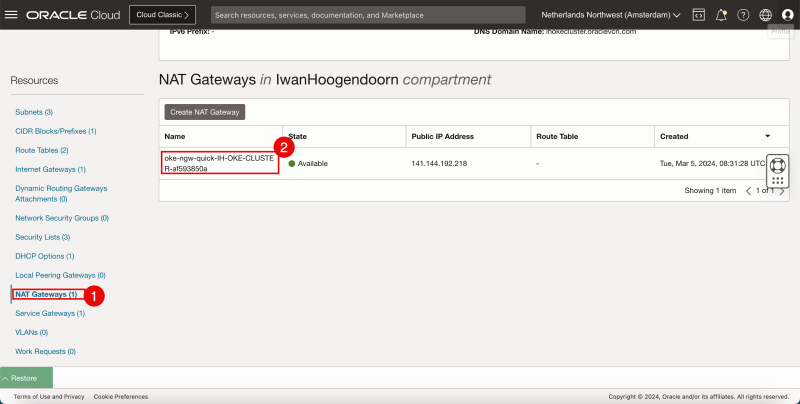
1. Click on the **NAT Gateways** to review the NAT Gateway that will provide internet connectivity using the private subnets to the internet. 2. Notice there is only one NAT Gateway.
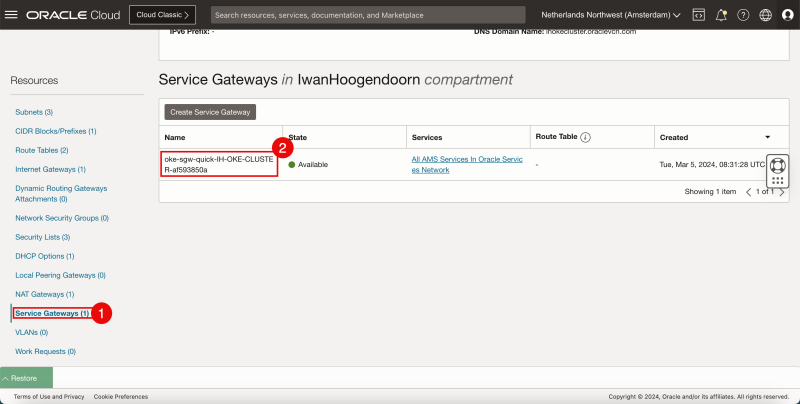
1. Click on the **Service Gateways** to review the Service Gateway that will provide private access to specific Oracle services, without exposing the data to an internet gateway or NAT gateway. 2. Notice there is only one Service Gateway.
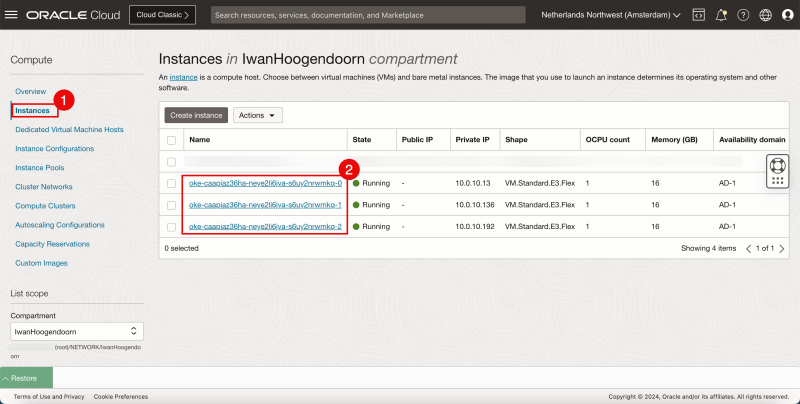
1. Navigate through the OCI Console using the hamburger menu and then **Compute** > **Instances.** 2. Notice three Instances that are created that will be used as the three Kubernetes Worker Nodes we specified during the deployment.
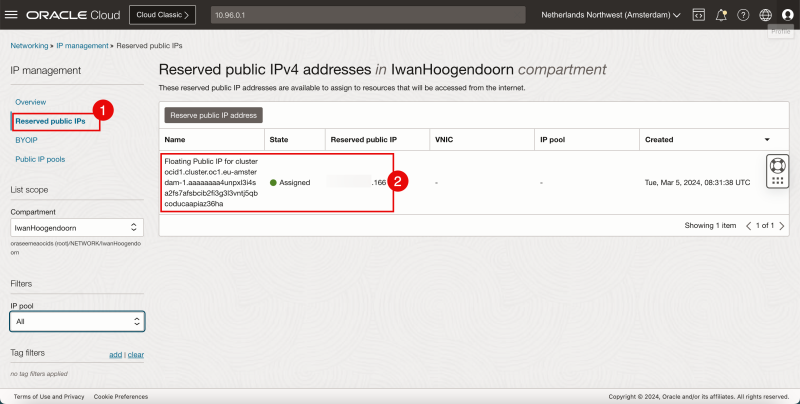
1. Navigate through the OCI Console using the hamburger menu and then **IP Management** > **Reserved public IPs.** 2. Notice there is one public IP address (ending with .166) reserved for the Kubernetes Public API endpoint.
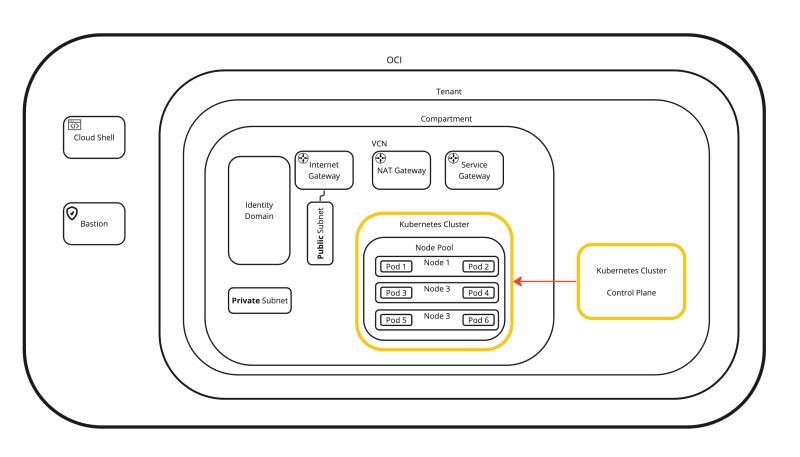
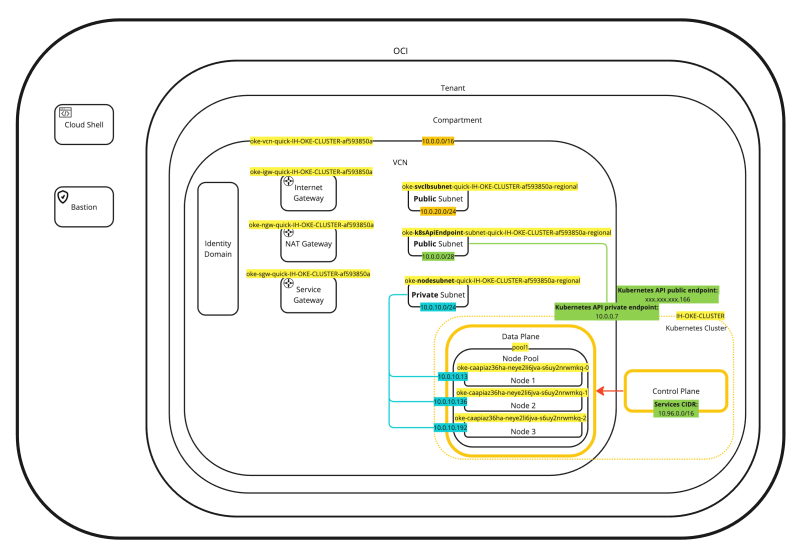
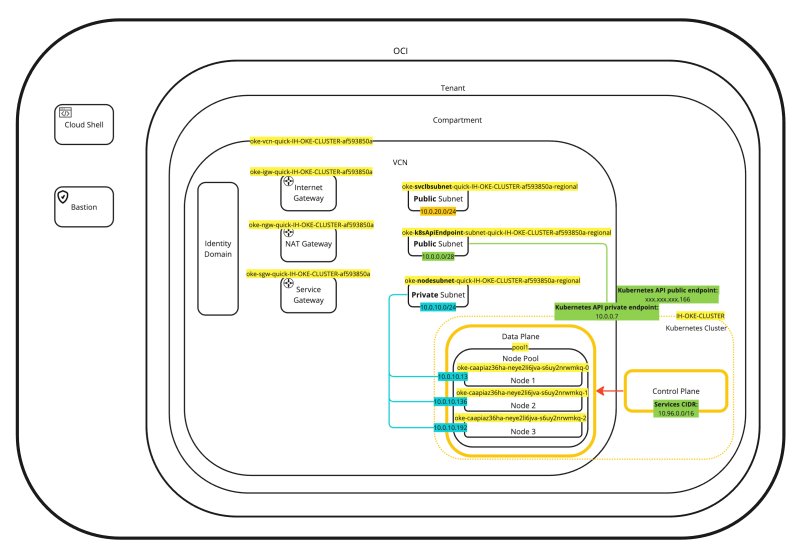
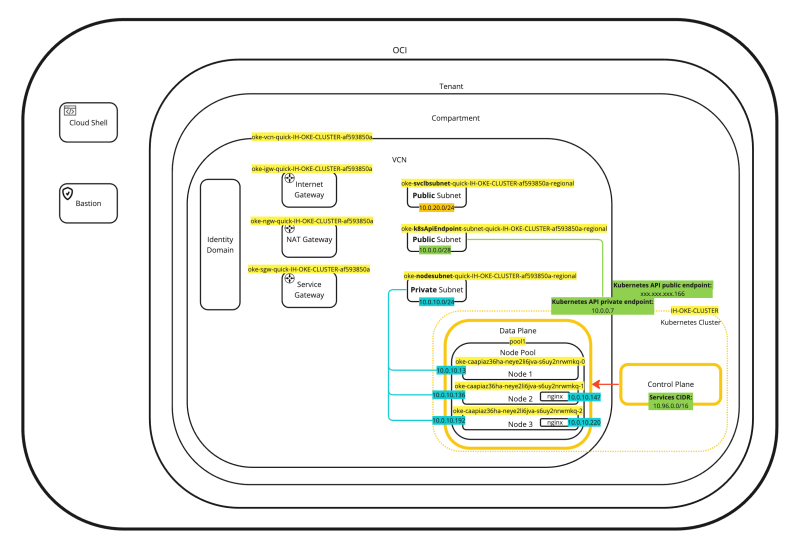
If we place every piece of information we have just collected and place that in a diagram the diagram will look something like this:
This will help to put everything more into context (or perspective).
Tables with configuration details to deploy OKE
VCN
| Resource | Name |
| --- | --- |
| VCN | • Name: oke-vcn-quick-IH-OKE-CLUSTER-af593850a
• CIDR Block: 10.0.0.0/16
• DNS Resolution: Selected |
| Internet Gateway | • Name: oke-igw-quick-IH-OKE-CLUSTER-af593850a |
| NAT Gateway | • Name: oke-ngw-quick-IH-OKE-CLUSTER-af593850a |
| Service Gateway | • Name: oke-sgw-quick-IH-OKE-CLUSTER-af593850a
• Services: All region Services in Oracle Services Network |
| DHCP Options | • DNS Type set to Internet and VCN Resolver |
Subnets
| Resource | Example |
| --- | --- |
| Public Subnet for Kubernetes API Endpoint | Purpose: Kubernetes API endpoint with the following properties:
• Type: Regional
• CIDR Block: 10.0.0.0/28
• Route Table: oke-public-routetable-IH-OKE-CLUSTER-af593850a
• Subnet Access: Public
• DNS Resolution: Selected
• DHCP Options: Default
• Security List: oke-k8sApiEndpoint-quick-IH-OKE-CLUSTER-af593850a |
| Private Subnet for Worker Nodes | Purpose: workernodes with the following properties:
• Type: Regional
• CIDR Block: 10.0.10.0/24
• Route Table: N/A
• Subnet Access: Private
• DNS Resolution: Selected
• DHCP Options: Default
• Security List: oke-nodeseclist-quick-IH-OKE-CLUSTER-af593850a |
| Private Subnet for Pods | Purpose: pods with the following properties:
• Type: Regional
• CIDR Block: 10.96.0.0/16
• Route Table: oke-private-routetable-IH-OKE-CLUSTER-af593850a
• Subnet Access: Private
• DNS Resolution: Selected
• DHCP Options: Default
• Security List: N/A |
| Public Subnet for Service Load Balancers | Purpose: Load balancers with the following properties:
• Type: Regional
• CIDR Block: 10.0.20.0/24
• Route Table: oke-private-routetable-IH-OKE-CLUSTER-af593850a
• Subnet Access: Public
• DNS Resolution: Selected
• DHCP Options: Default
• Security List: oke-svclbseclist-quick-IH-OKE-CLUSTER-af593850a |
Route Tables
| Resource | Example |
| --- | --- |
| Route Table for Public Kubernetes API Endpoint Subnet | Purpose: routetable-Kubernetes API endpoint, with one route rule defined as follows:
• Destination CIDR block: 0.0.0.0/0
• Target Type: Internet Gateway
• Target: oke-igw-quick-IH-OKE-CLUSTER-af593850a |
| Route Table for Private Pods Subnet | Purpose: routetable-pods, with two route rules defined as follows:
• Rule for traffic to the internet:
◦ Destination CIDR block: 0.0.0.0/0
◦ Target Type: NAT Gateway
◦ Target: oke-ngw-quick-IH-OKE-CLUSTER-af593850a
• Rule for traffic to OCI services:
◦ Destination: All region Services in Oracle Services Network
◦ Target Type: Service Gateway
◦ Target: oke-sgw-quick-IH-OKE-CLUSTER-af593850a |
| Route Table for Public Load Balancers Subnet | Purpose: routetable-serviceloadbalancers, with one route rule defined as follows:
• Destination CIDR block: 0.0.0.0/0
• Target Type: Internet Gateway
• Target: oke-igw-quick-IH-OKE-CLUSTER-af593850a |
Security List Rules for Public Kubernetes API Endpoint Subnet
The **oke-k8sApiEndpoint-quick-IH-OKE-CLUSTER-af593850a** security list has the ingress and egress rules shown below:
- Ingress Rules:**
| Stateless | Source | IP Protocol | Source Port Range | Destination Port Range | Type and Code | Allows | Description | | --- | --- | --- | --- | --- | --- | --- | --- | | No | 0.0.0.0/0 | TCP | All | 6443 | | TCP traffic for ports: 6443 | External access to Kubernetes API endpoint | | No | 10.0.10.0/24 | TCP | All | 6443 | | TCP traffic for ports: 6443 | Kubernetes worker to Kubernetes API endpoint communication | | No | 10.0.10.0/24 | TCP | All | 12250 | | TCP traffic for ports: 12250 | Kubernetes worker to control plane communication | | No | 10.0.10.0/24 | ICMP | | | 3, 4 | ICMP traffic for: 3, 4 Destination Unreachable: Fragmentation Needed and Don't Fragment was Set | Path discovery |
- Egress Rules:**
| Stateless | Destination | IP Protocol | Source Port Range | Destination Port Range | Type and Code | Allows | Description | | --- | --- | --- | --- | --- | --- | --- | --- | | No | All AMS Services In Oracle Services Network | TCP | All | 443 | | TCP traffic for ports: 443 HTTPS | Allow Kubernetes Control Plane to communicate with OKE | | No | 10.0.10.0/24 | TCP | All | All | | TCP traffic for ports: All | All traffic to worker nodes | | No | 10.0.10.0/24 | ICMP | | | 3, 4 | ICMP traffic for: 3, 4 Destination Unreachable: Fragmentation Needed and Don't Fragment was Set | Path discovery |
Security List Rules for Private Worker Nodes Subnet
The **oke-nodeseclist-quick-IH-OKE-CLUSTER-af593850a** security list has the ingress and egress rules shown below:
- Ingress Rules:**
| Stateless | Source | IP Protocol | Source Port Range | Destination Port Range | Type and Code | Allows | Description | | --- | --- | --- | --- | --- | --- | --- | --- | | No | 10.0.10.0/24 | All Protocols | | | | All traffic for all ports | Allow pods on one worker node to communicate with pods on other worker nodes | | No | 10.0.0.0/28 | ICMP | | | 3, 4 | ICMP traffic for: 3, 4 Destination Unreachable: Fragmentation Needed and Don't Fragment was Set | Path discovery | | No | 10.0.0.0/28 | TCP | All | All | | TCP traffic for ports: All | TCP access from Kubernetes Control Plane | | No | 0.0.0.0/0 | TCP | All | 22 | | TCP traffic for ports: 22 SSH Remote Login Protocol | Inbound SSH traffic to worker nodes | | No | 10.0.20.0/24 | TCP | All | 32291 | | TCP traffic for ports: 32291 | | | No | 10.0.20.0/24 | TCP | All | 10256 | | TCP traffic for ports: 10256 | | | No | 10.0.20.0/24 | TCP | All | 31265 | | TCP traffic for ports: 31265 | |
- Egress Rules:**
| No | 10.0.10.0/24 | All Protocols | | | | All traffic for all ports | Allow pods on one worker node to communicate with pods on other worker nodes | | --- | --- | --- | --- | --- | --- | --- | --- | | No | 10.0.0.0/28 | TCP | All | 6443 | | TCP traffic for ports: 6443 | Access to Kubernetes API Endpoint | | No | 10.0.0.0/28 | TCP | All | 12250 | | TCP traffic for ports: 12250 | Kubernetes worker to control plane communication | | No | 10.0.0.0/28 | ICMP | | | 3, 4 | ICMP traffic for: 3, 4 Destination Unreachable: Fragmentation Needed and Don't Fragment was Set | Path discovery | | No | All AMS Services In Oracle Services Network | TCP | All | 443 | | TCP traffic for ports: 443 HTTPS | Allow nodes to communicate with OKE to ensure correct start-up and continued functioning | | No | 0.0.0.0/0 | ICMP | | | 3, 4 | ICMP traffic for: 3, 4 Destination Unreachable: Fragmentation Needed and Don't Fragment was Set | ICMP Access from Kubernetes Control Plane | | No | 0.0.0.0/0 | All Protocols | | | | All traffic for all ports | Worker Nodes access to Internet |
Security List Rules for Public Load Balancer Subnet
The **oke-svclbseclist-quick-IH-OKE-CLUSTER-af593850a** security list has the ingress and egress rules shown below:
- Ingress Rules:**
| Stateless | Source | IP Protocol | Source Port Range | Destination Port Range | Type and Code | Allows | Description | | --- | --- | --- | --- | --- | --- | --- | --- | | No | 0.0.0.0/0 | TCP | All | 80 | | TCP traffic for ports: 80 | |
- Egress Rules:**
| Stateless | Destination | IP Protocol | Source Port Range | Destination Port Range | Type and Code | Allows | Description | | --- | --- | --- | --- | --- | --- | --- | --- | | No | 10.0.10.0/24 | TCP | All | 32291 | | TCP traffic for ports: 32291 | | | No | 10.0.10.0/24 | TCP | All | 10256 | | TCP traffic for ports: 10256 | | | No | 10.0.10.0/24 | TCP | All | 31265 | | TCP traffic for ports: 31265 | |
STEP 03 - Verify if the Oracle Kubernetes Cluster cluster is running using the CLI
- Go back to the overview page of the Kubernetes Clusters (OKE).
- Click the hamburger menu > **Developer Services** > **Kubernetes Clusters (OKE)**.
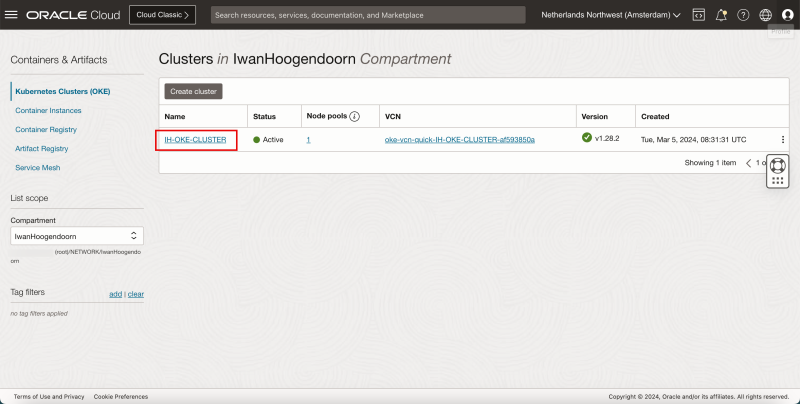
- Click on the Kubernetes Cluster that was just created.
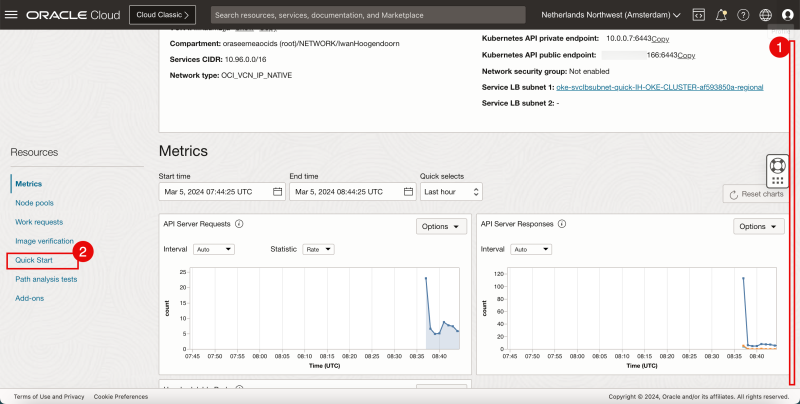
1. Scroll down. 2. Click on **Quick Start**.
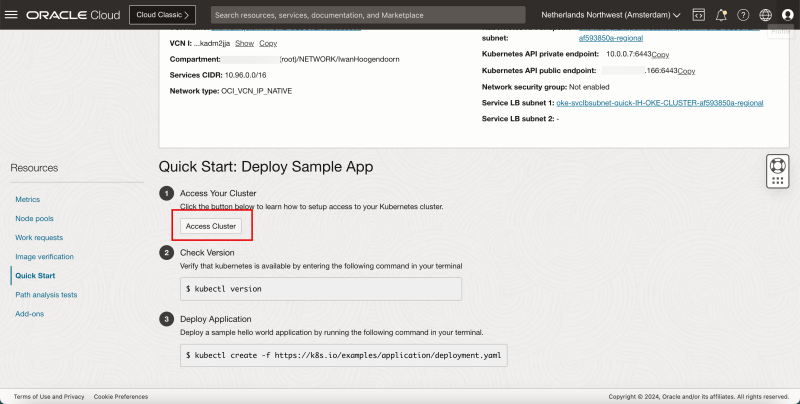
- Click on **Access Cluster**.
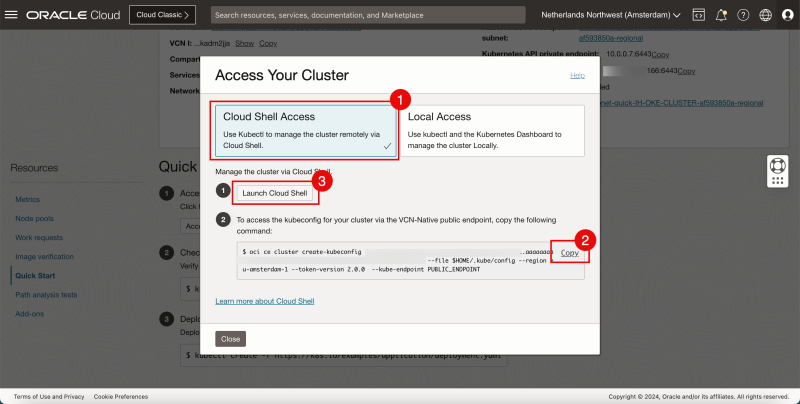
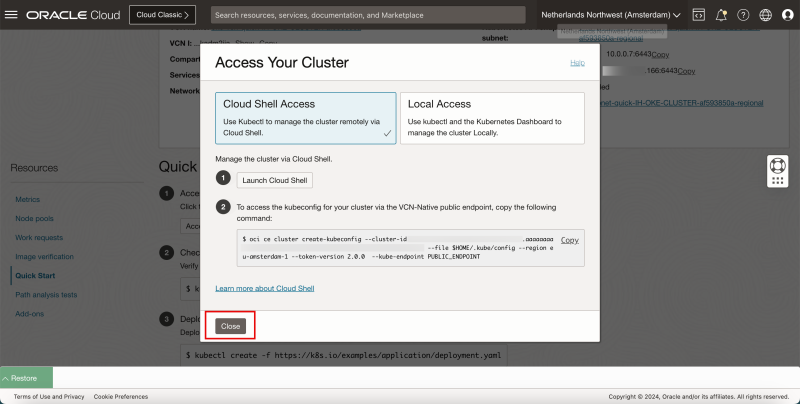
1. Select **Cloud Shell Access**. 2. Click on **Copy** to copy the command to allow access to the Kubernetes Cluster. 3. Click on **Launch Cloud Shell**.
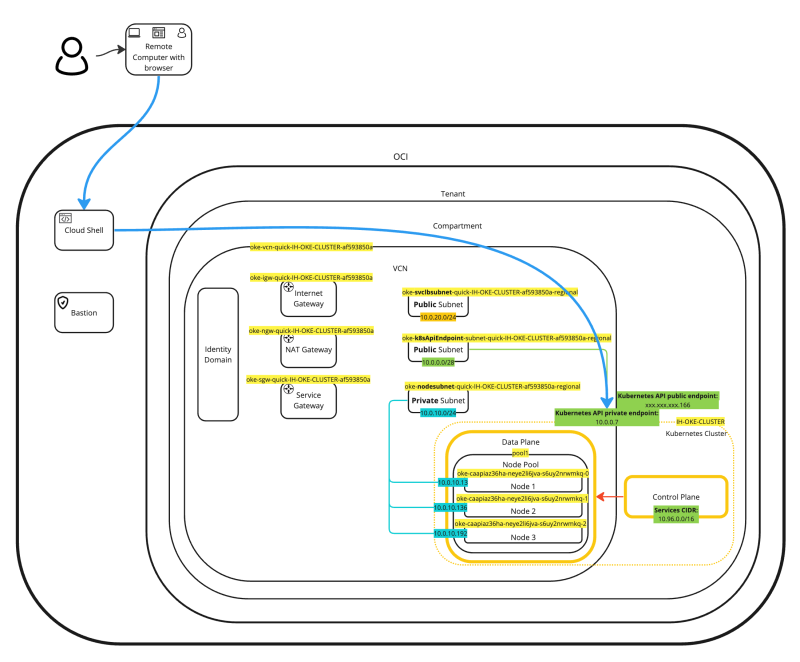
- This is a diagram of how the connection will be made to perform management on the OKE cluster using Cloud Shell.
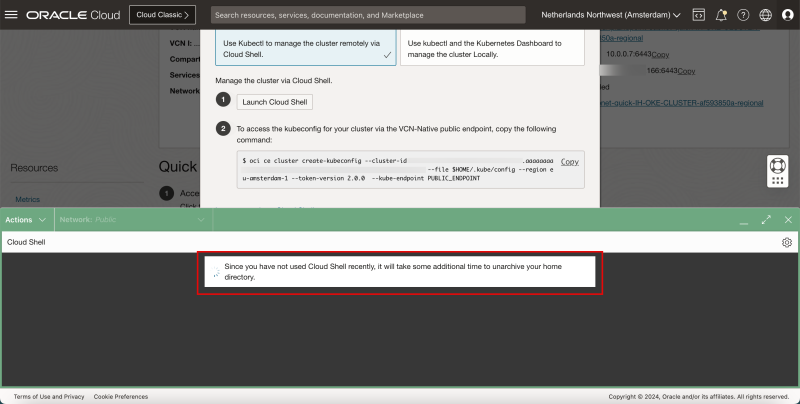
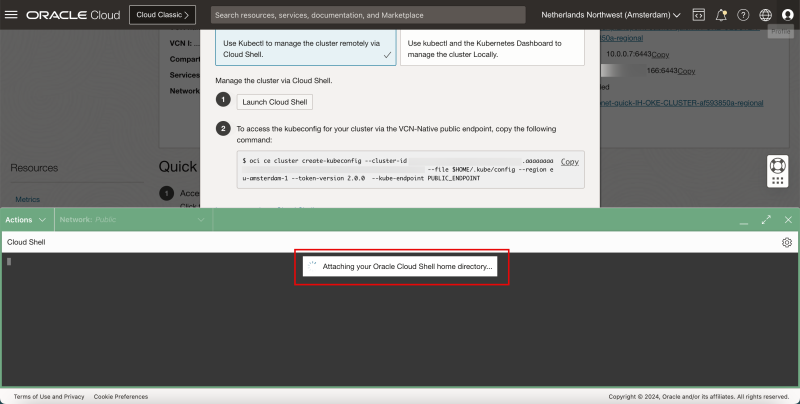
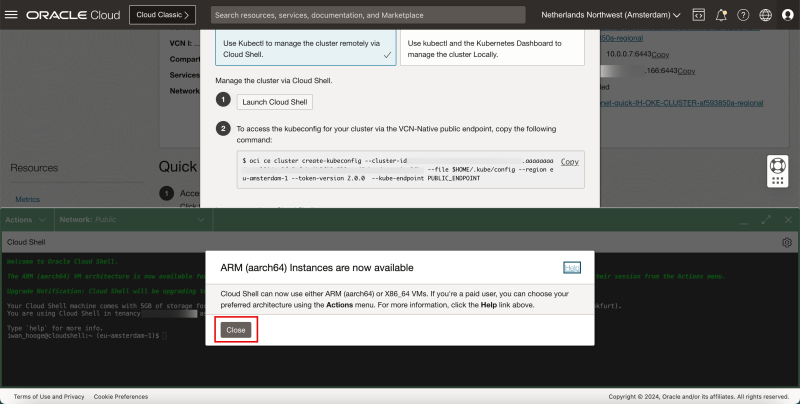
- The Cloud Shell will now start.
- Some informational messages will be shown on what is happening in the background.
- In this case, it is possible to let Cloud Shell run on different CPU architectures. - Click on **Close** to close this informational message.
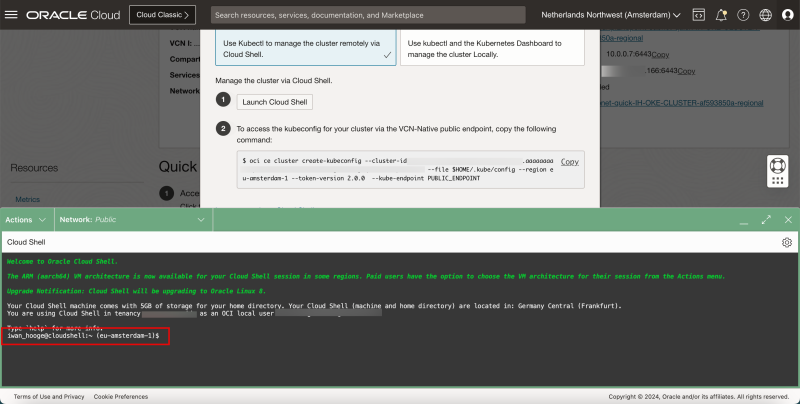
- Now we are ready to use the Cloud Shell to access to the Kubernetes Cluster.
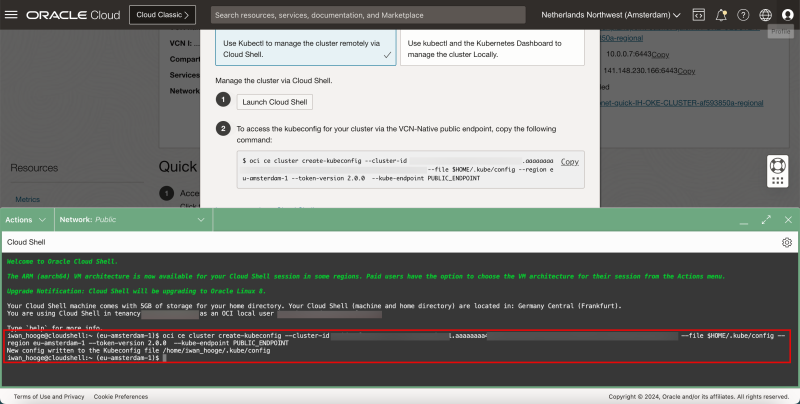
- Paste in the command that was copied before.
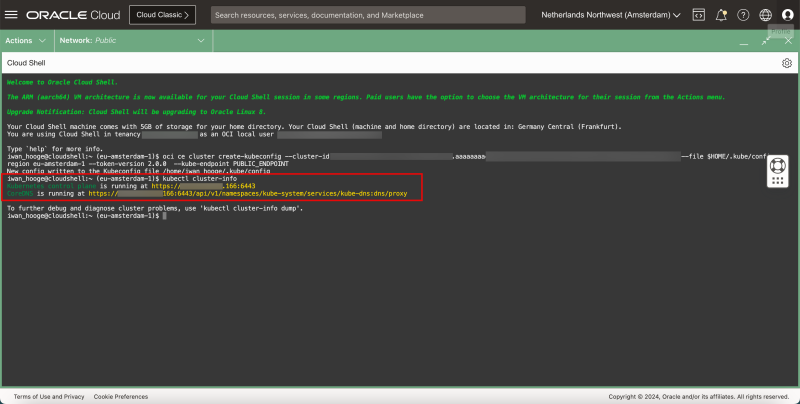
- Issue the following command to gather information about the Kubernetes Cluster:
kubectl cluster-info
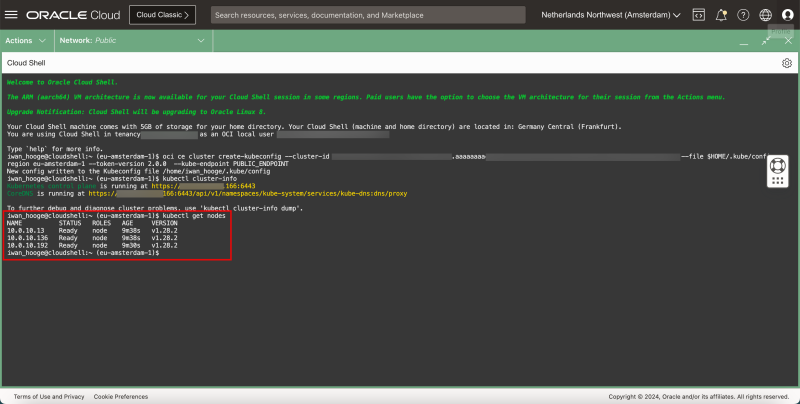
- Issue the following command to gather information about the Worker Nodes:
kubectl get nodes
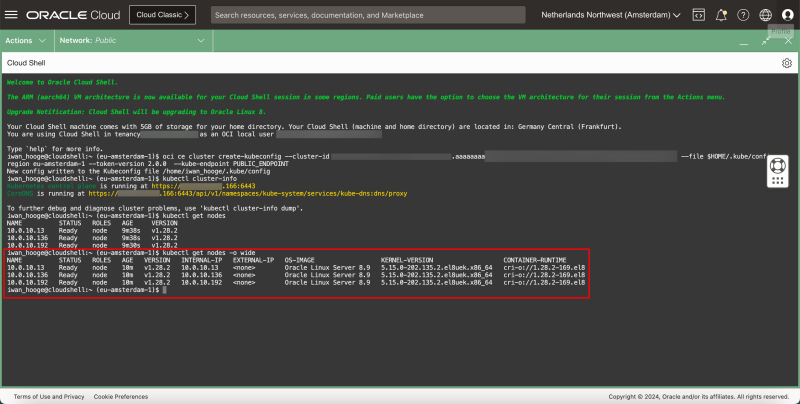
- Issue another command to gather more information about the Worker Nodes:
kubectl get nodes -o wide
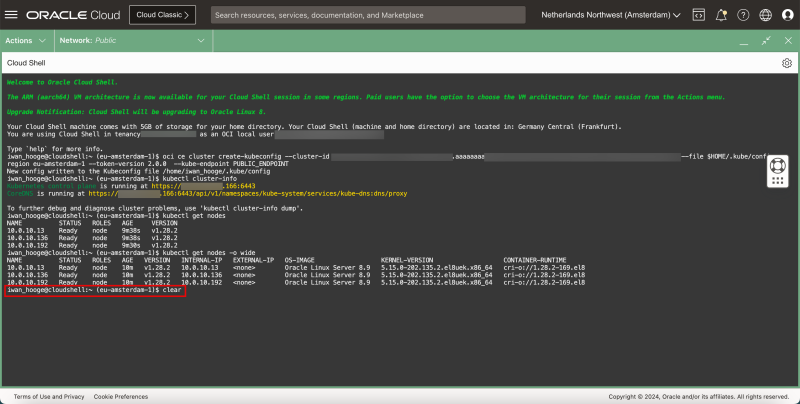
- Issue the following command to clear the screen and start with a fresh new screen.
clear
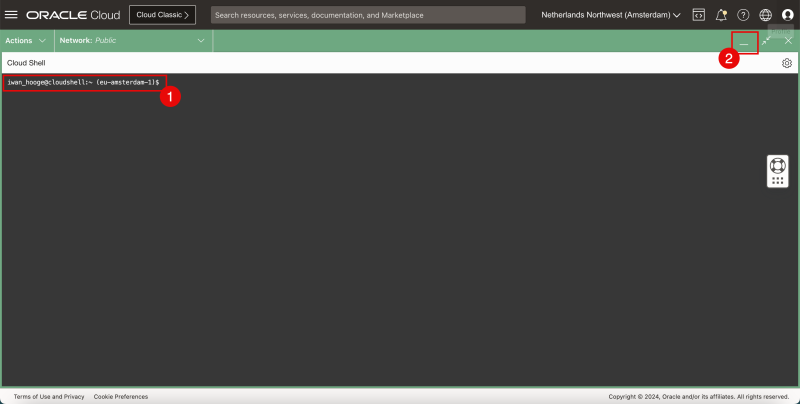
1. Notice that the previous output has been cleared (but is still accessible when you scroll up) 2. Click on minimize to minimize the Cloud Shell window.
- Click on **Close** to close the Access Cluster information.
STEP 04 - Deploy a sample NGINX application using kubectl
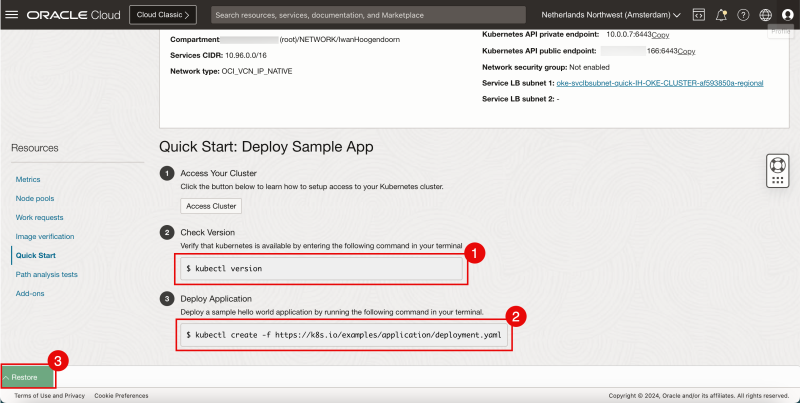
1. Make a note of the command to gather the Kubernetes Version. 2. Make a note of the command to gather the Deploy a sample application. 3. Click on **Restore** to restore the Cloud Shell window (to issue the commands).
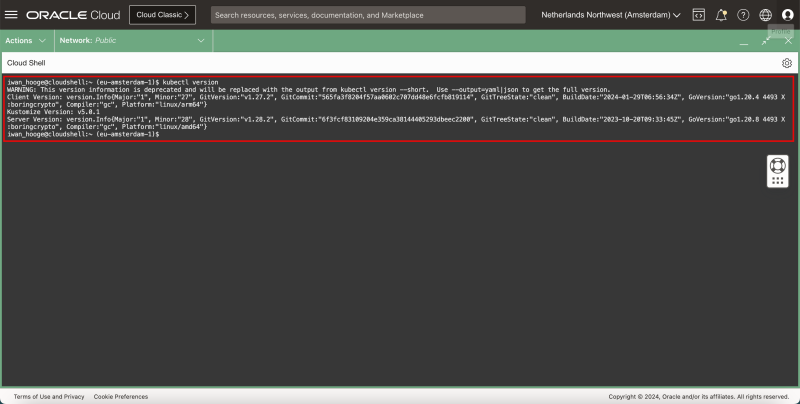
- Issue this command to gather the Kubernetes Version:
kubectl version
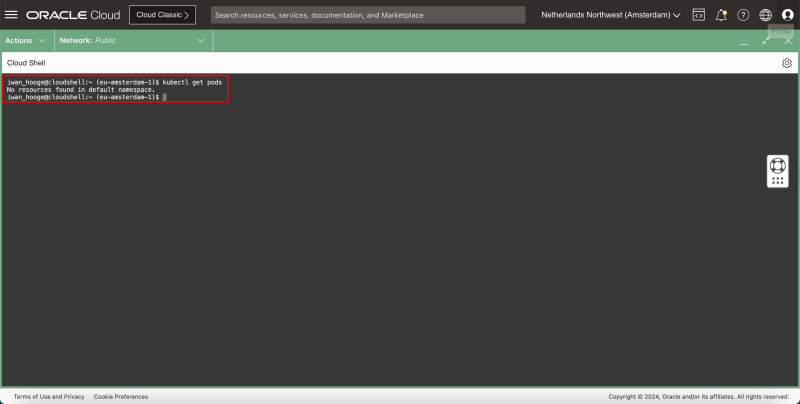
- Issue the following commands to verify the current pods (applications) that are deployed:
kubectl get pods
- Notice that there are no resources found.
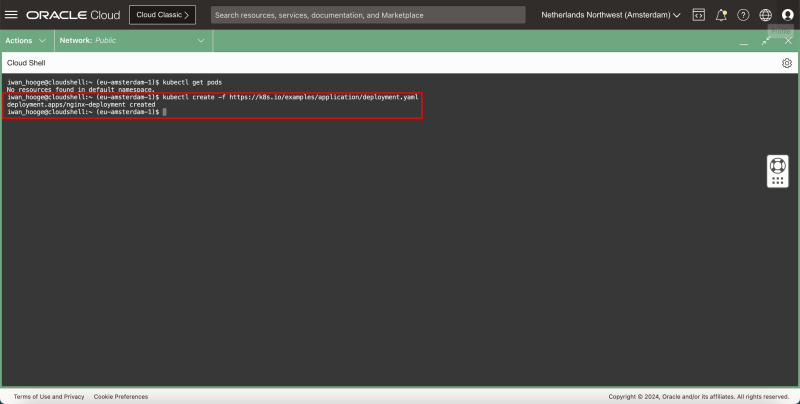
- Issue the following command to deploy a new (sample) application:
kubectl create -f https://k8s.io/examples/application/deployment.yaml
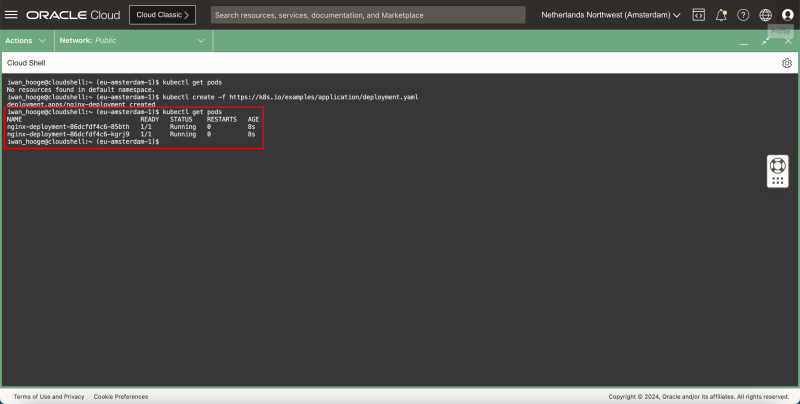
- Issue the following commands to verify the current pods (applications) that are deployed:
kubectl get pods
- Notice that there are PODS in the RUNNING state. - This means that the application we just deployed is running.
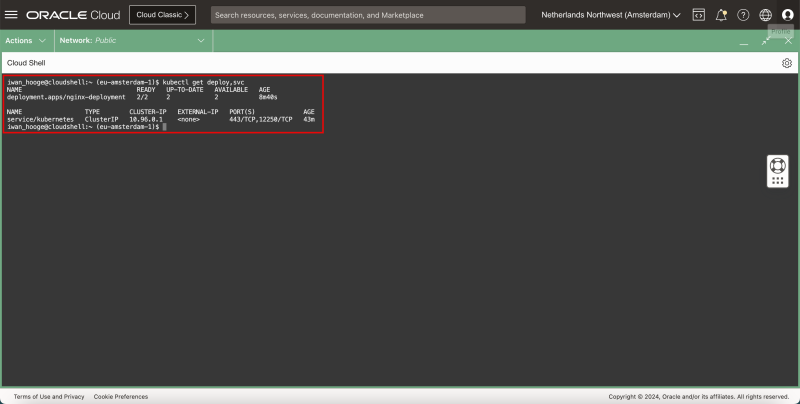
- Issue the following command to gather the IP addresses to access the application:
kubectl get deploy,svc
- Notice that the newly deployed application does not have any IP addresses assigned and that only the Kubernetes Cluster has a ClusterIP service attached to it with an internal IP address.
- Issue the following command to look at the attached (network) services for the newly deployed application specifically:
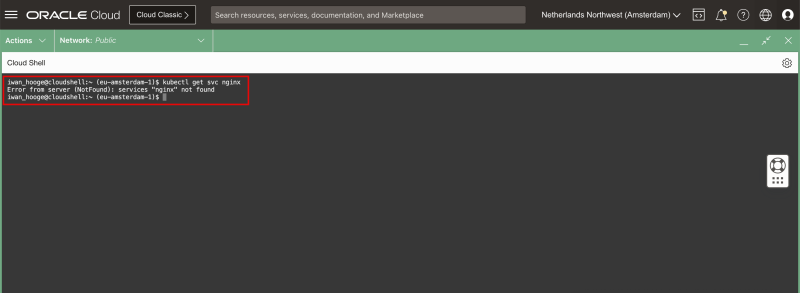
kubectl get svc ngnix
- Notice that there are no (network) services deployed (or attached) for the deployed (NGINX) application. - For this reason, we will not be able to access the application from another application or use the web browser to access the webpage in the NGINX web server. - This will be addressed in a future tutorial.
STEP 05 - Deploy a sample MySQL application using helm chart
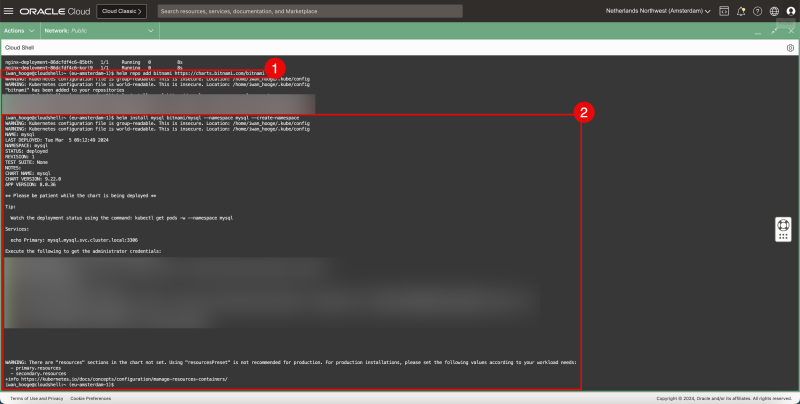
- A Helm chart is a package that contains all the necessary resources to deploy an application to a Kubernetes cluster. 1. Issue the following command to add the Bitnami Repository for the MySQL database Helm chart is a package: 2. Issue the following command to deploy a MySQL database on the Kubernetes Worker Nodes and also create a new namespace (mysql):
helm repo add bitnami https://charts.bitnami.com/bitnami
helm install mysql bitnami/mysql -–namespace mysql --create-namespace
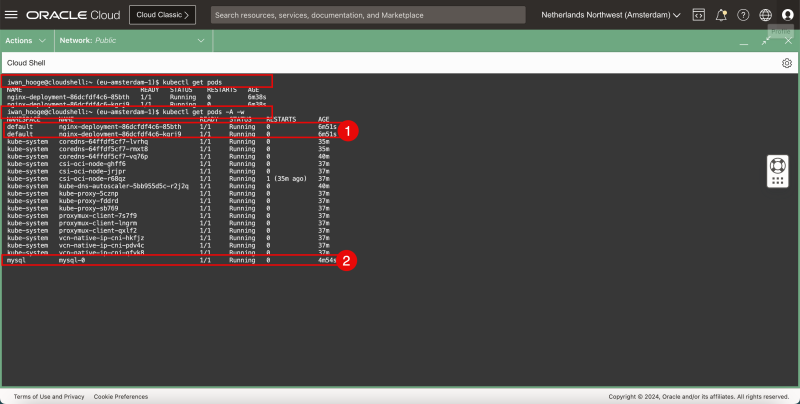
- Issue the following command to gather the deployed applications: - This command will only display the deployed applications in the current (default) namespace):
kubectl get pods
- Notice that only the NGINX application is showing up in the default (current) namespace. - This command will now display the deployed applications cluster-wide (all namespaces):
kubectl get pods -A -w
1. Notice that the NGINX application is running in the default namespace 2. Notice that the MySQL application is running in the (new) mysql namespace.
STEP 06 - Clean up PODS and Namespaces
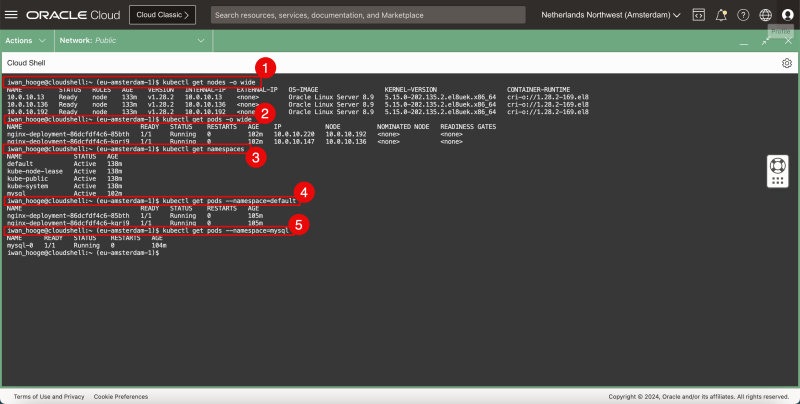
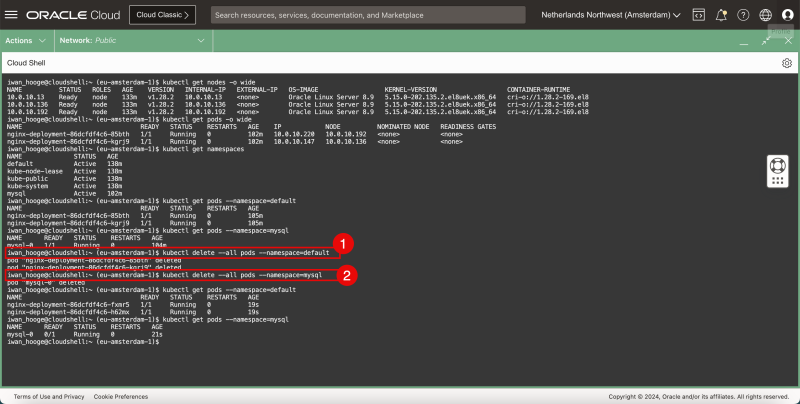
- Now that we have deployed an application in the default namespace (NGINX) and another application in a new namespace (MySQL) using Helm charts, let's clean up the environment so we can start fresh whenever we need to. 1. Use this command to gather all the worker nodes (cluster-wide). 2. Use this command to gather all the running pods in the current (default) namespace 3. Use this command to gather all the namespaces. 4. Use this command to gather all the running pods in the current (default) namespace specifically. 5. Use this command to gather all the running pods in the mysql namespace specifically.
1.
kubectl get nodes -o wide
2.
kubectl get pods -o wide
3.
kubectl get namespaces
4.
kubectl get pods --namespace=default
5.
kubectl get pods --namespace=mysql
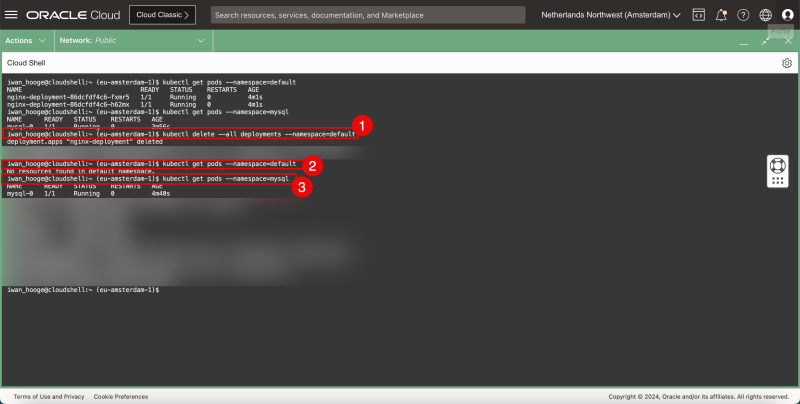
1. Issue this command to delete all deployments/pods in the default namespace. 2. Issue this command to verify if the deployments/pods are deleted. 3. Use this command to gather all the running pods in the mysql namespace specifically. Just Verify if this still exists.
1.
kubectl delete --all deployments --namespace=default
2.
kubectl get pods --namespace=default
3.
kubectl get pods --namespace=mysql
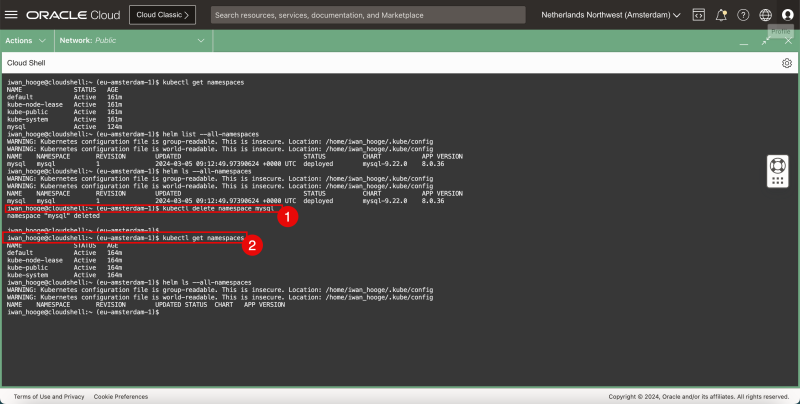
1. Issue this command to delete all deployments/pods AND the complete mysql namespace. 2. Use this command to gather all the namespaces, and verify if the mysql namespace is deleted.
1.
kubectl delete namespace mysql
2.
kubectl get namespaces
Conclusion
In this tutorial we have deployed a Kubernetes Control cluster and worker nodes are fully deployed and configured inside Oracle Cloud Infrastructure (OCI). This is what we call the Oracle Cloud Kubernetes Engine (OKE). I have also deployed two sample applications in two different namespaces where one application was deployed using a Helm Chart in a new namespace. In the end, we cleaned up the applications/pods. We have not deployed any network services for Kubernetes-operated applications/pods in this tutorial yet.
